Hello Everyone!! Let us discuss on how to install Ubuntu on your own computer system. In this tutorial we are clearly explain installation process step by step. Most of the companies for develop an android app and web application Ubuntu is very familiar OS to develop applications. We include all steps like what are the hardware requirement, how to install by using DVD and USB to boot, location details etc. Kindly follow below steps for Ubuntu installation.
1 – Overview :
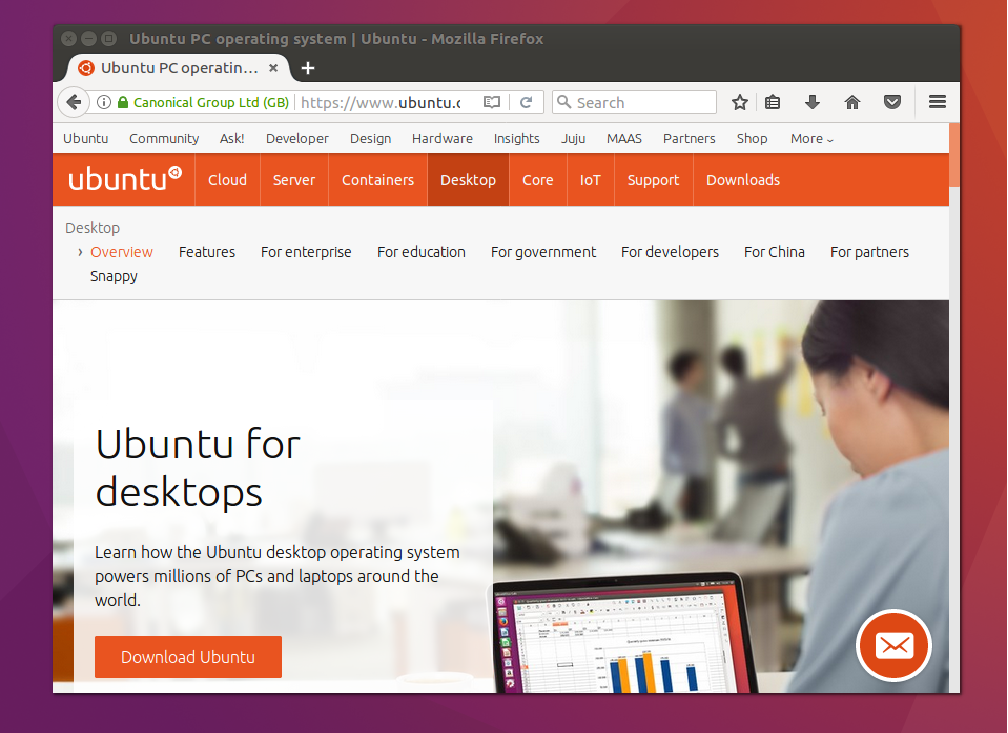
The Ubuntu desktop is simple to use, easy to install and includes everything you need to run your organization, school, home or company. It’s also open supply, comfortable, available and free to download. We are going to install Ubuntu on desktop and your laptop, the use of either your computer’s DVD drive or a USB flash drive.
2 – Requirements :
You will need to remember the following steps before starting the installation:
A – Connect your computer to a power supply.
B – Ensure you have at the least 5GB of free storage space.
C – Have access to both a DVD or a USB flash drive containing the version of Ubuntu you need to install.
D – Make sure you’ve got a recent backup of your data while it’s unlikely that anything will go wrong, you could in no way be too organized.
3 – Boot from DVD :
It’s easy to boot Ubuntu from a DVD. After that, what you have to do:
- Insert the Ubuntu DVD into your optical/DVD drive.
- Restart your computer.
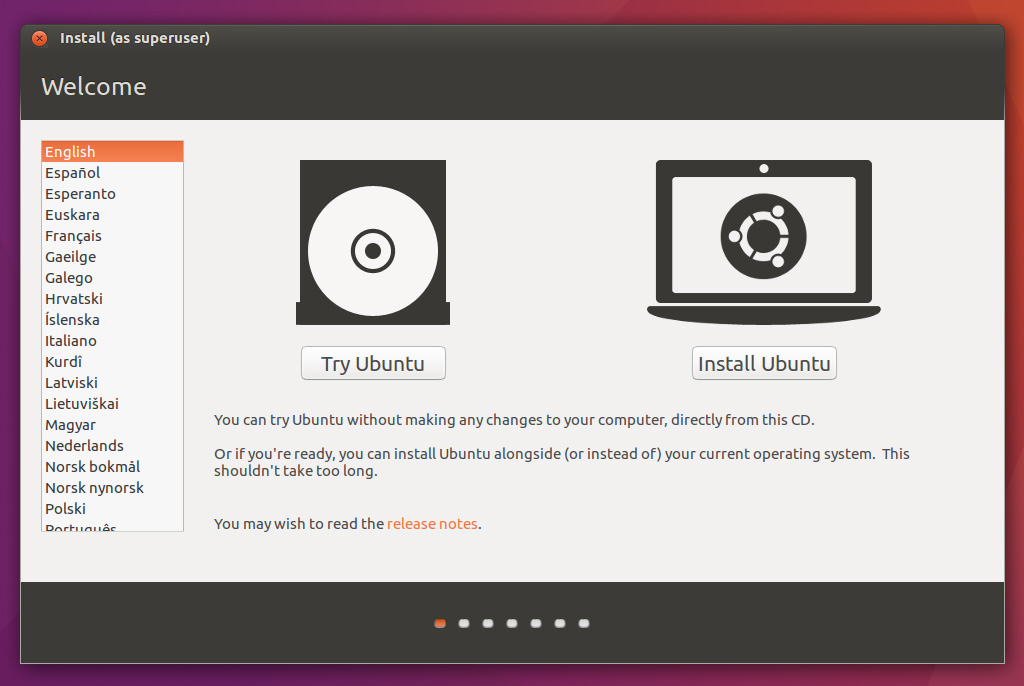
After few moments later, the computer has loaded, you’ll see the welcome window. Now you can choose your language from a list on the left drawer and choose between either installing Ubuntu directly.
4 – Boot from USB flash drive :
Most computer systems will boot from USB automatically. Insert your USB drive and start your computer or if it is turned on please restart it . You have to see the same welcome window we saw in the previous ‘install from DVD’ step, prompting you to select your language and either installation or try the Ubuntu desktop.
In case your computer doesn’t automatically boot from USB, try holding F12 when your computer first starts. With most machines, this can allow you to select the USB device from a system-specific boot menu.
5 – Prepare to install Ubuntu :
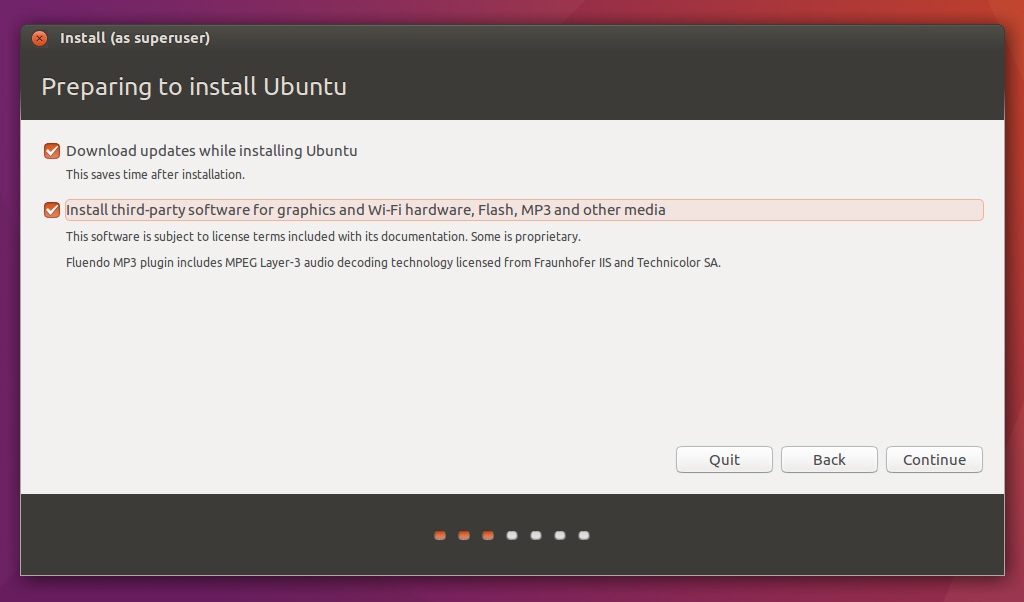
After selecting option install Ubuntu from the welcome window, you’ll be asked about updates and third-party software.
- We suggest allowing each download updates and installation third-party software.
- Stay connected to the internet so that you can get the latest updates while you install Ubuntu.
- In case you are not connected to the internet, you’ll be requested to choose a wi-fi network, if available. We suggest you to connect for the duration of the installation so we can ensure your device is updated.
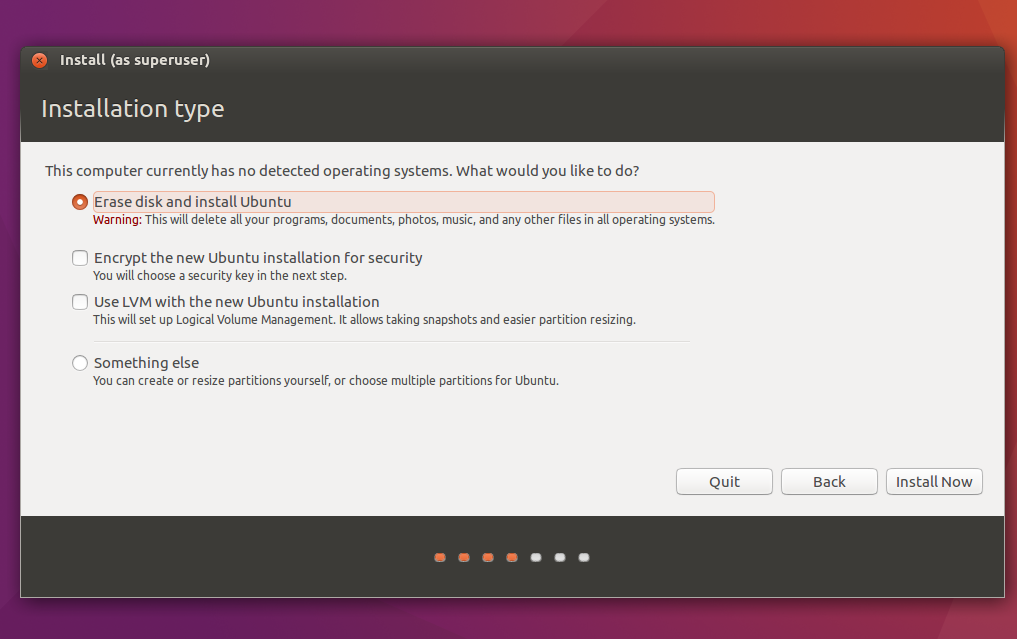
6 – Allocate drive space :
Use the checkboxes to select whether or not you want to install Ubuntu alongside some other operating device, delete your current operating system and update it with Ubuntu, or — if you’re an advanced user — select the ‘something else’ choice.
7 – Begin installation :
After configuring garage, click on the ‘install Now’ button. A small pane will appear with an overview of the storage options you have selected, with the chance to go again if the info are incorrect kindly click on continue button.
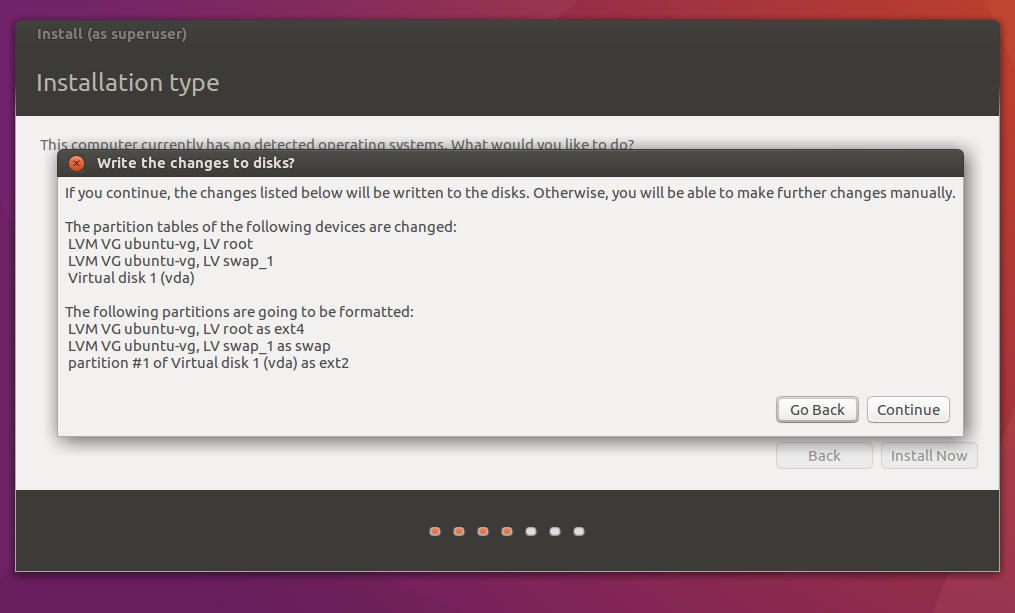
Click on retain to fix those changes in location and start the installation procedure.
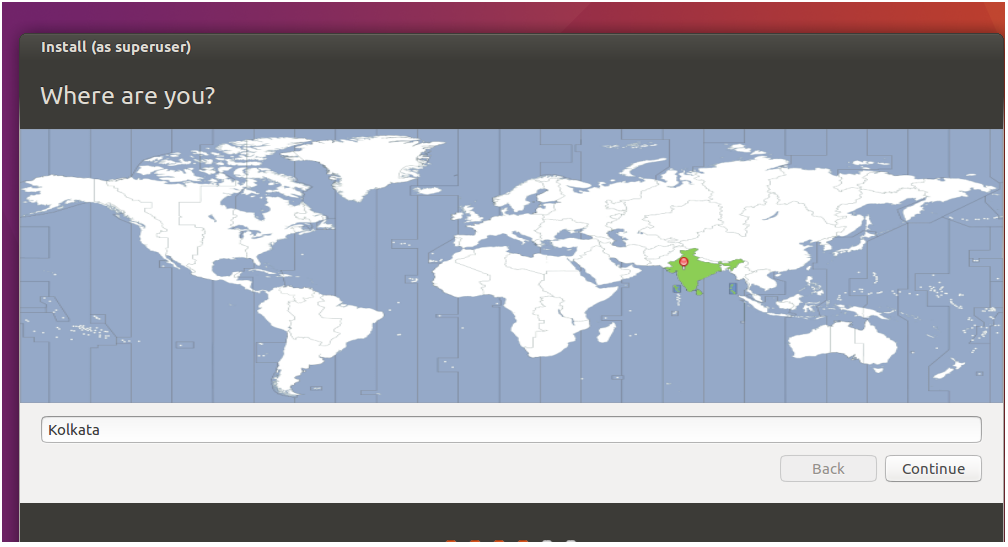
8 – Select your own location :
If you are connected to the net, your location may be detected automatically. Check your location is correct and click on ‘continue’ to move forward.
If you have not connected with internet so you can select your timezone in the map and click to continue .
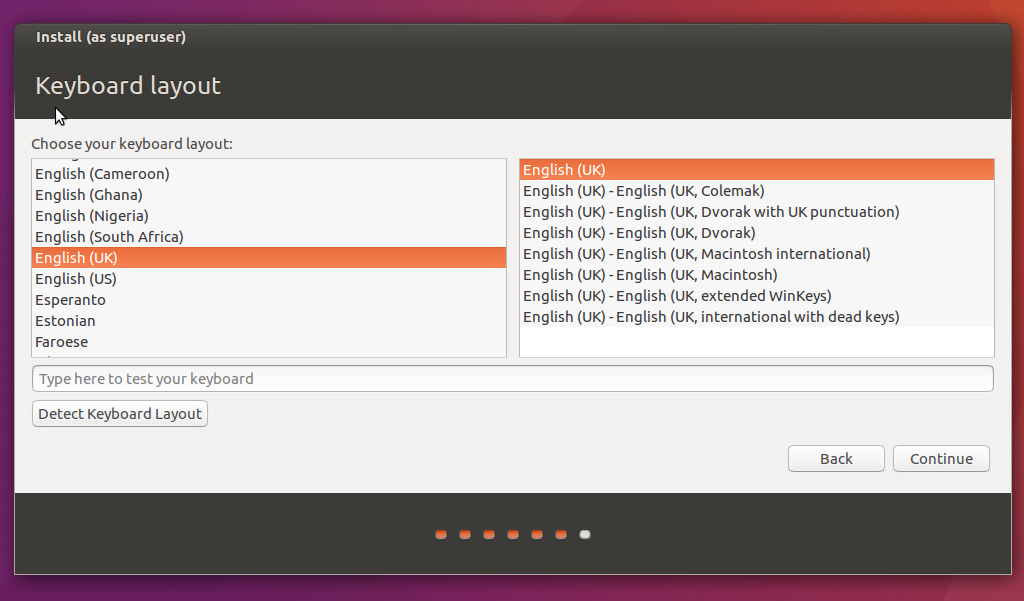
9 – Select your preferred keyboard layout :
After selecting region you may see keyboard layout window. In that you can select your keyboard layout. If you’re not sure, click on the ‘detect Keyboard layout’ button for help. Keyboard layouts can always be changed, and supplementary layouts added from the desktop after installation.
10 – Login details :
After that, Computer name will be appeared in network. You can set username and password for your computer. Even as your username will be your login and account name.
Then Next, Please Enter a strong password. The installer will let you know if it’s too weak.
You may also select to enable automatic login and home folder encryption. In case your system is portable, we suggest keeping automatic login disabled and enabling encryption. This should stop people having access to your private files if the system is lost or stolen.
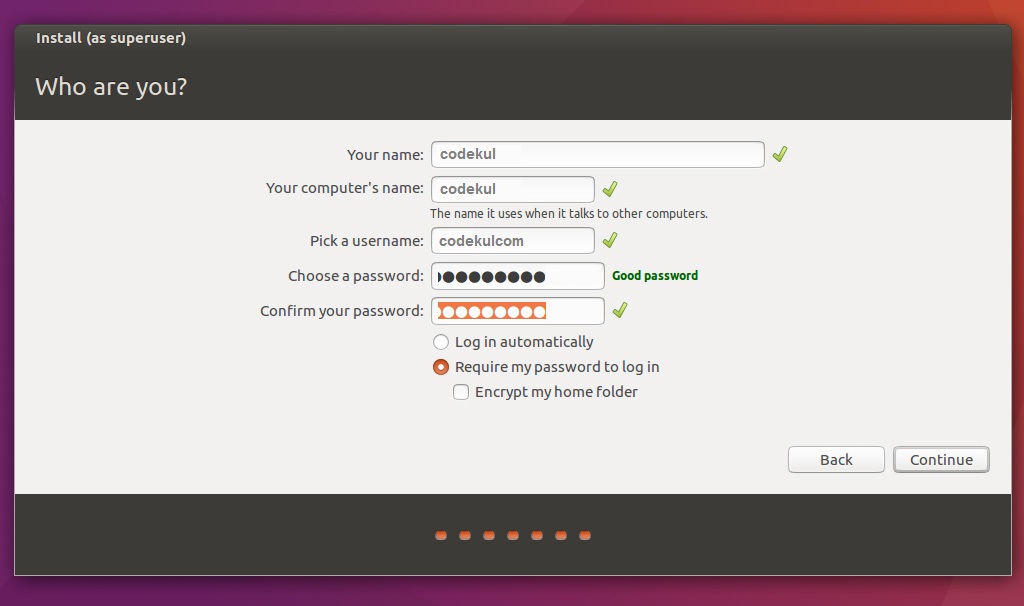
If enable home folder encryption and you forget about your password, you may not be able to retrieve any private information stored in your home folder.
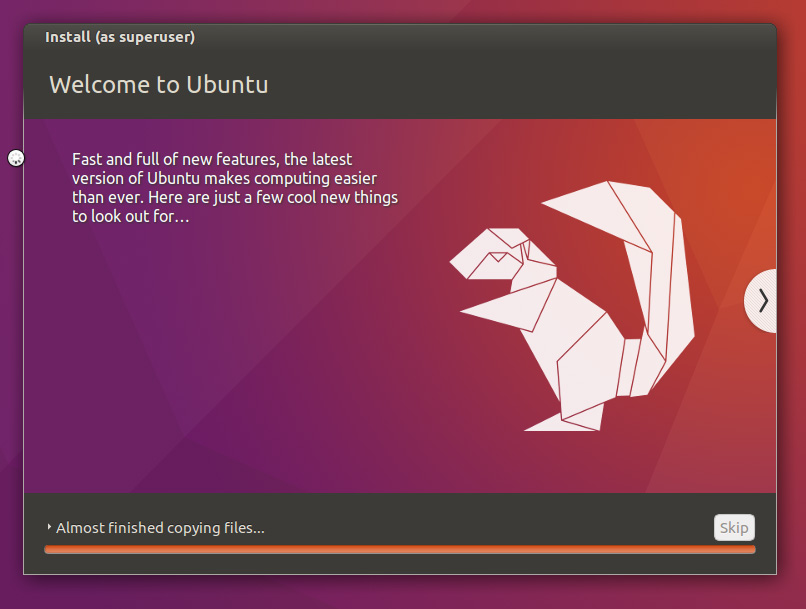
11 – Background Installation :
The installer will now complete inside the background while the installation window teaches you a little about how awesome Ubuntu is. Depending on the speed of your device and network connection, this should only take a few minutes.
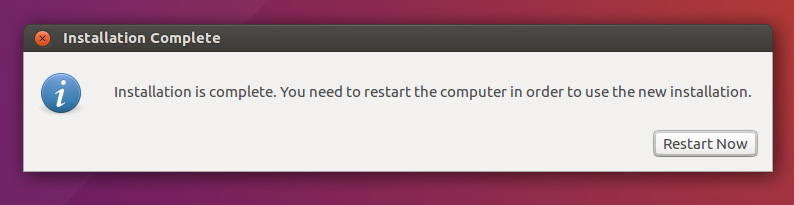
12 – Installation complete :
At the last, Everything has been installed and configured, a small window will appear asking you to restart your machine. click on Restart Now and remove both the DVD or USB flash drive when promoted.
Congratulations! You have successfully installed Linux operating system!
Leave A Comment