You build your first app and it’s ready to publish ? Great ! but you are confusing about how to publish it on app store.That’s why we made this step-through-step manual to App store submission. This guide includes all the steps required to correctly publish an developed iOS app to the App Store.
Step 1: Create an Apple ID :
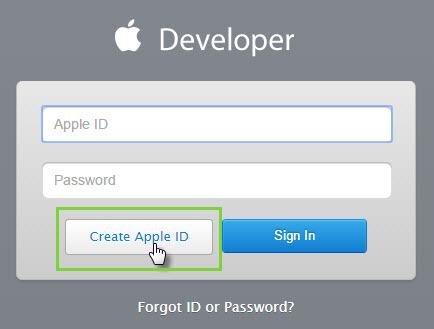
- First of all go to apple developer account Login :- https://developer.apple.com/register/
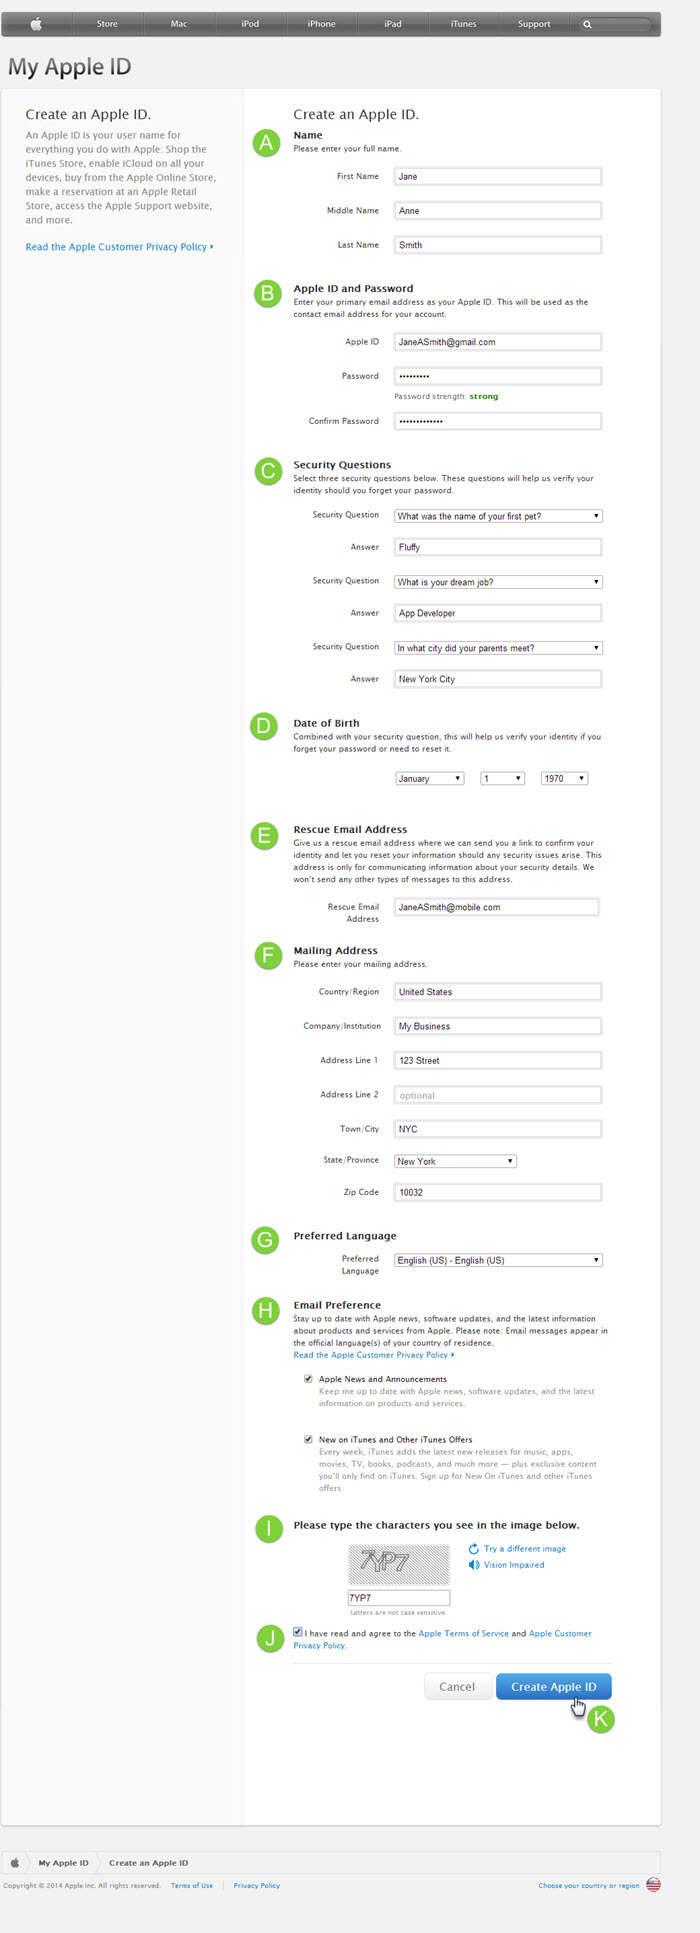
- Click on Create Apple ID Button

3. Provide your personal information and click Create Apple ID.
4. Check your email id and verify your email address, by clicking verify now.

5. Now Enter your Login credentials, and click verify Address.
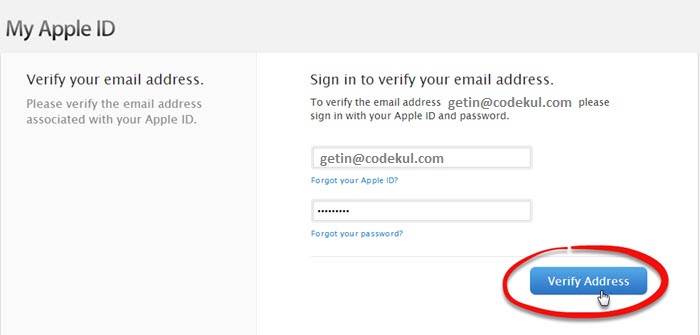
6. You will get email address verified message.

Step 2: Register a Developer Account with Apple
- Go to apple developer account and Login https://developer.apple.com/
- Enter your Apple ID and password and click on Sign In button.
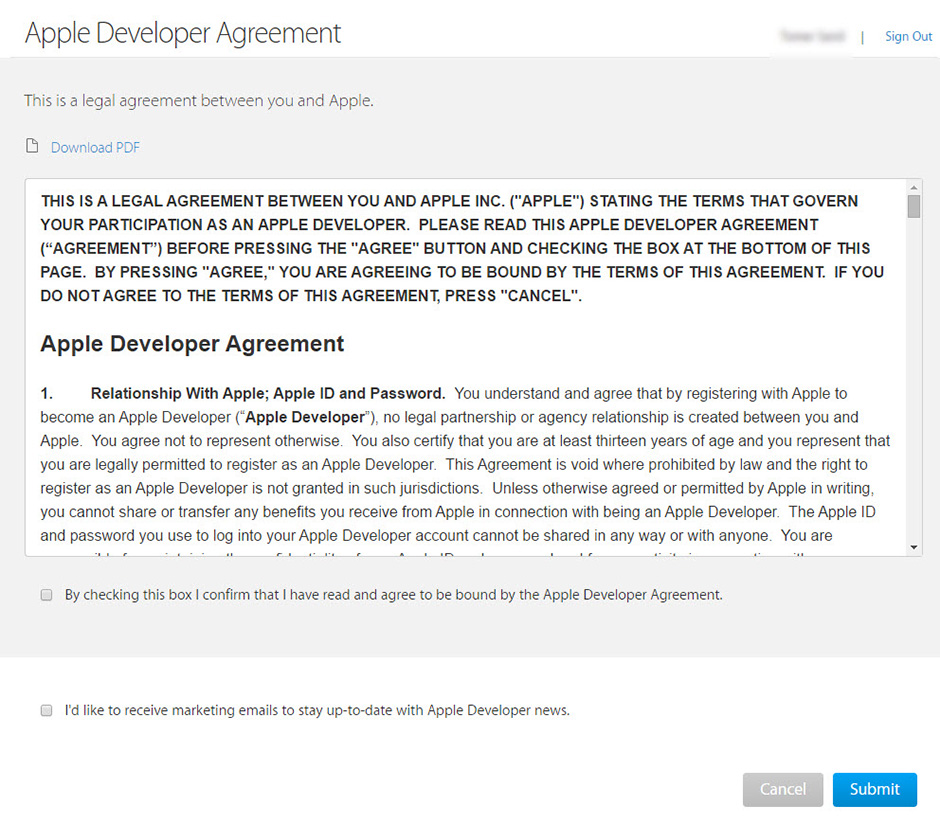
3. Review the agreement, select the confirmation check box and click Submit.
4. Select your Entity Type (ex. individual, company/organization, government) and click on Continue button.
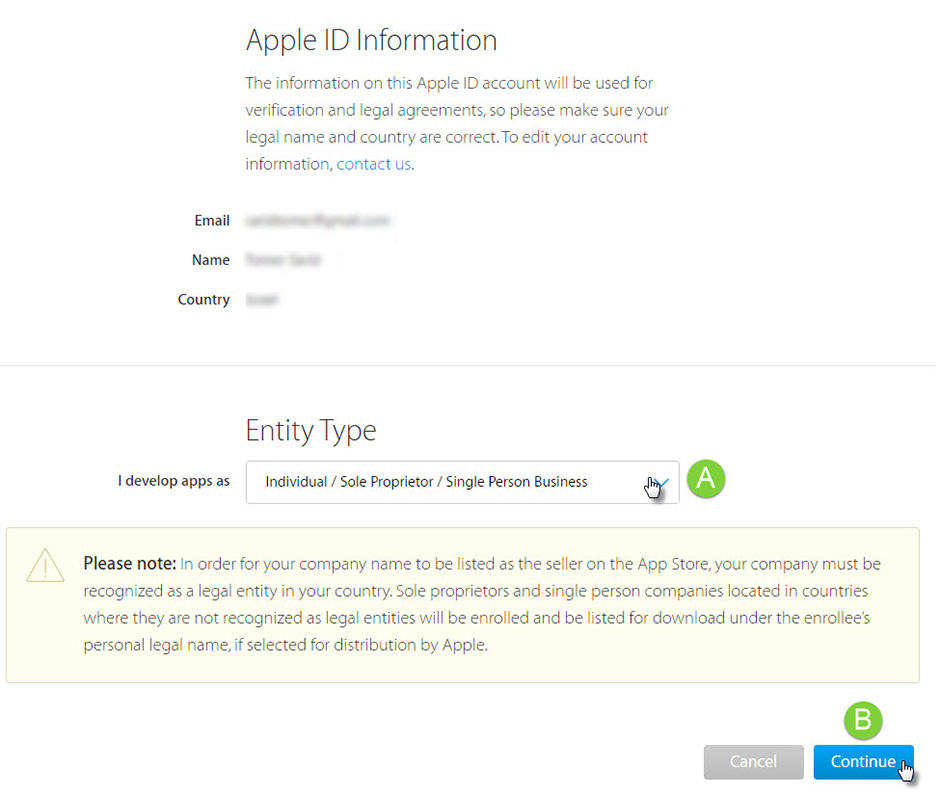
5. Fill out your contact information.

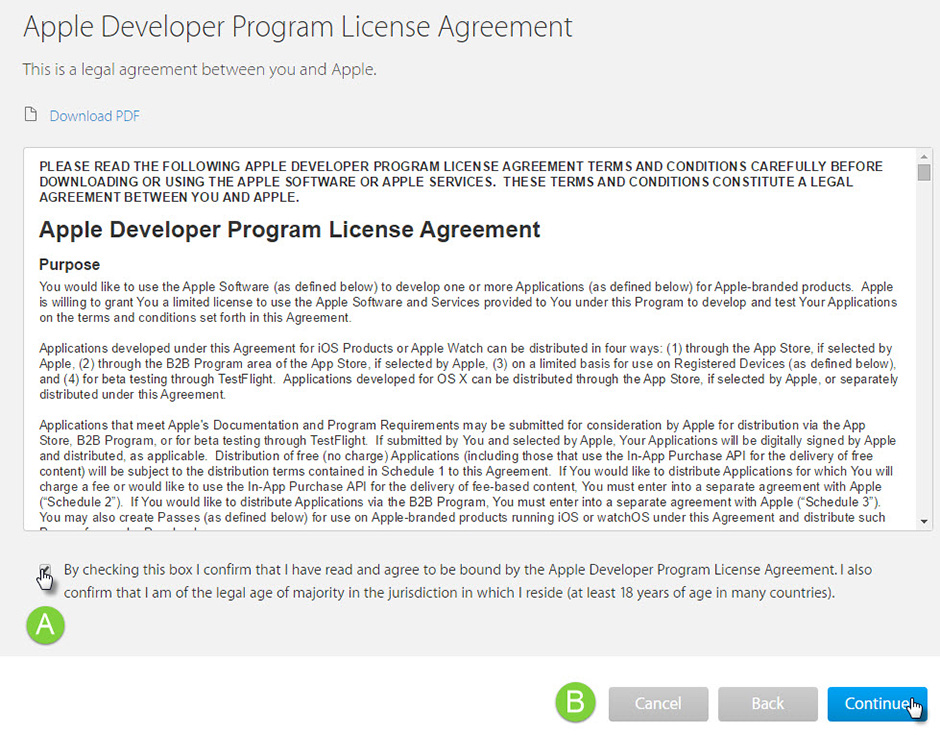
6. After reviewing the Apple Developer Program License Agreement, check the box to agree and click Continue.
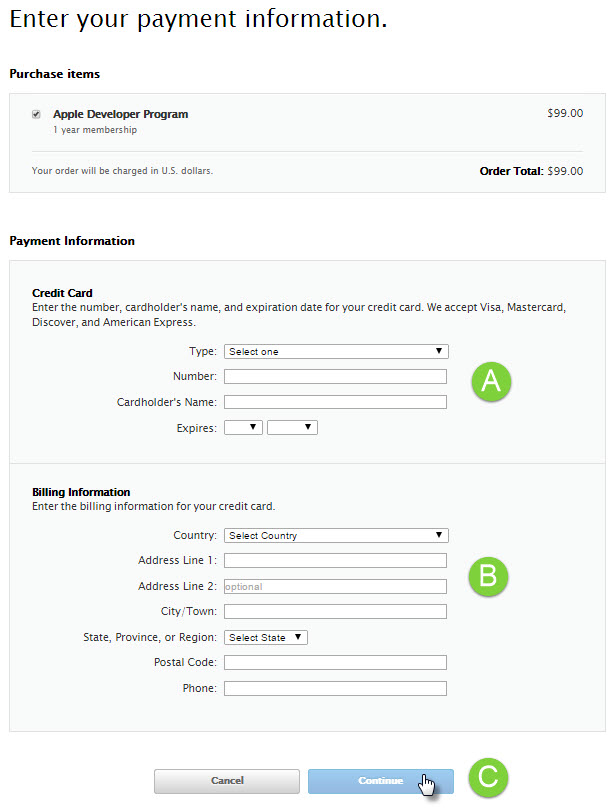
7. Click on Purchase to complete your purchase (an annual fee of $99).
8. Enter your payment information and click Continue.
Once you have completed the payment process, all you have to do is wait for an email from Apple approving your payment.
Step 3-A: Download your Distribution Certificate
A. Click on Account https://developer.apple.com
B. Login in with apple email address and password
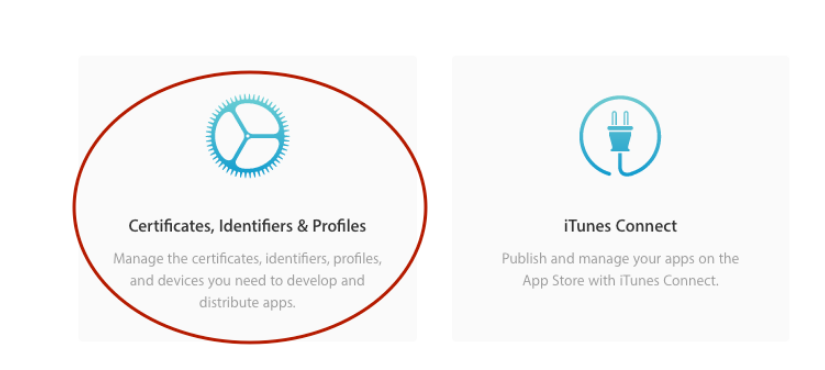
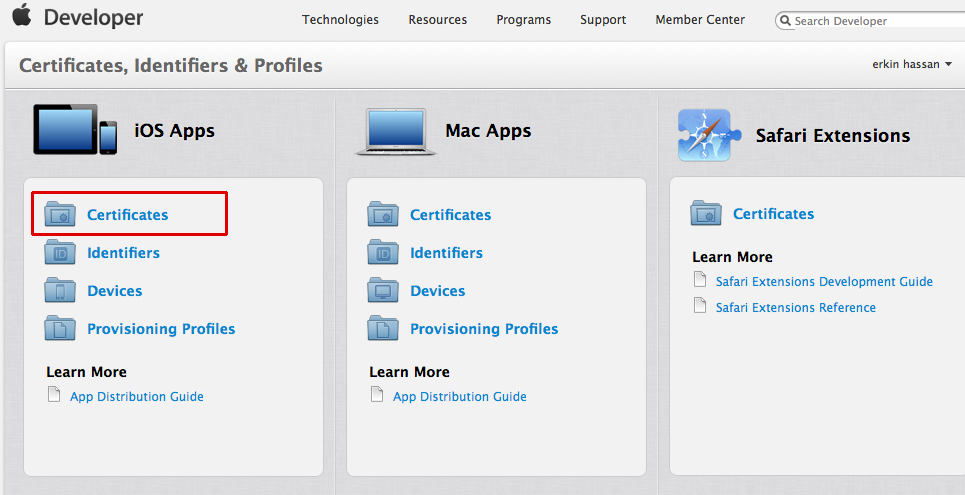
C. Click on certificates, identifiers & Profiles
Click on Certificate
D. Click on All
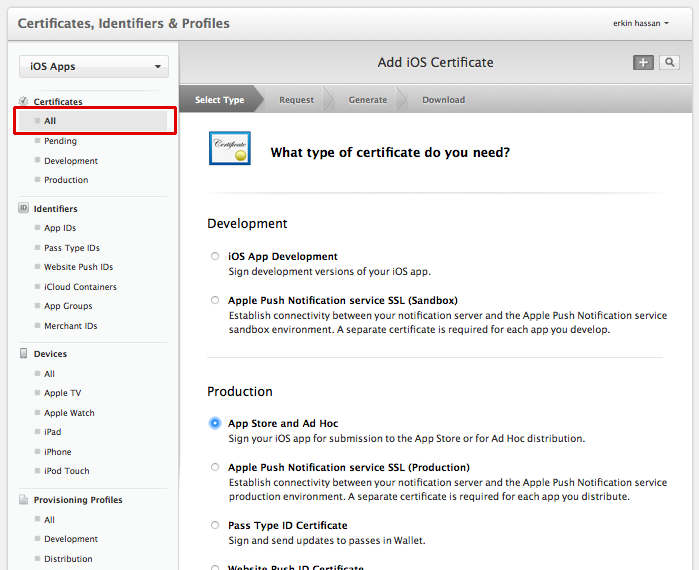
E. Select App store & Ad Hoc from Production
F. Click on Continue
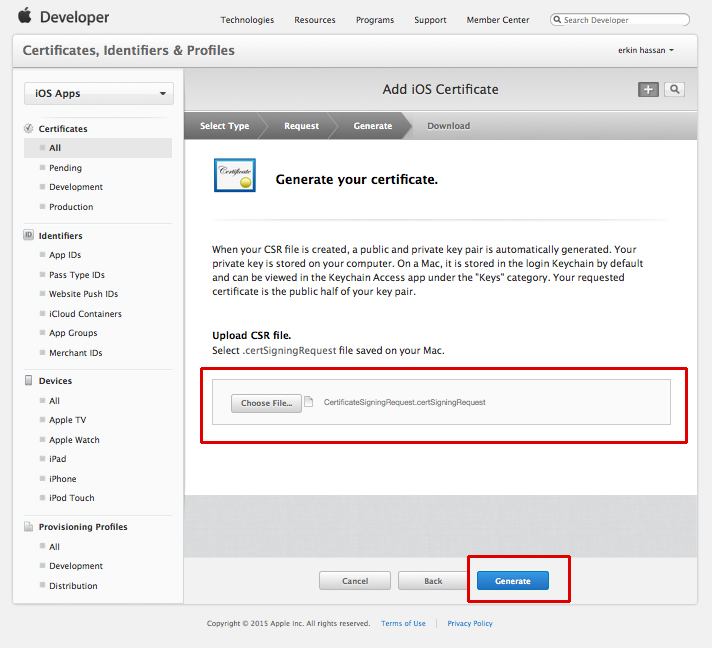
G. Choose File and uploads . CSR certificates and click on generate.
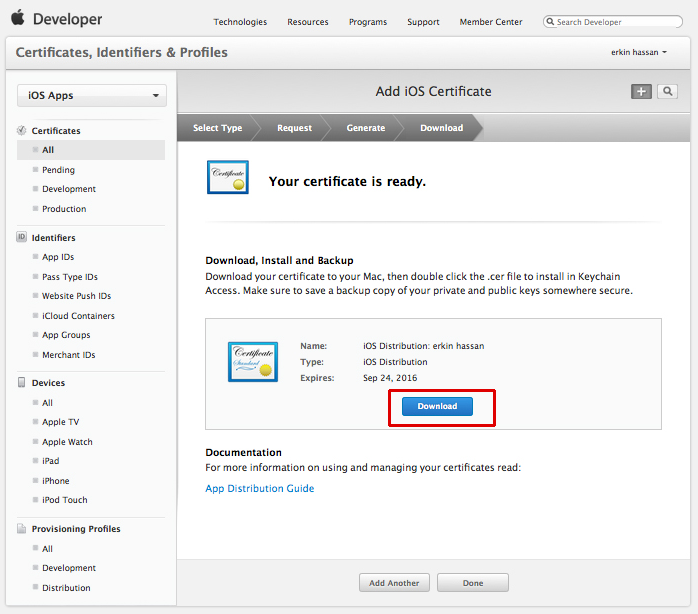
H. Click on Download and download iOS distribution certificate.
Step 3 – B : Create App ID
- Click on Identifiers.

- Select APP IDs and then click on + button
- Fill in the details.
Step 3 – C : Insert APNs Certificate
- Under App Ids, click on Edit
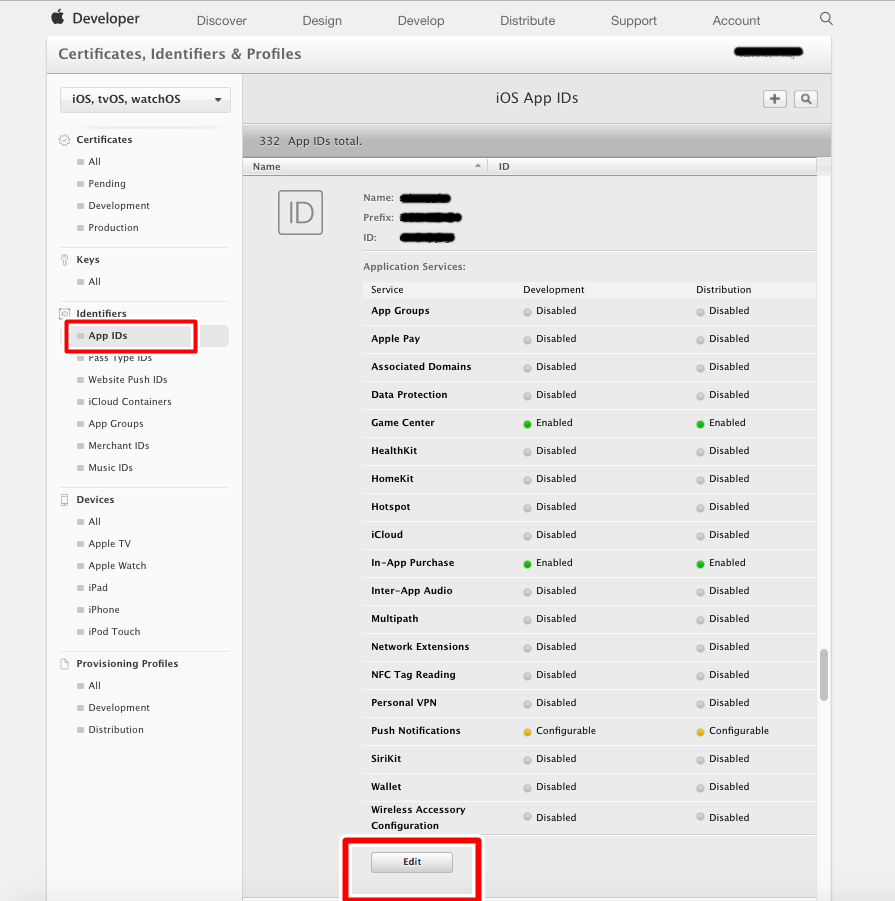
2. Attach CSR file in Development SSL Certificate and Production SSL Certificate and click on Done
Step 3 – D : Create a Distribution Provisioning Profile
- Click on Distribution Tab and then click on + button
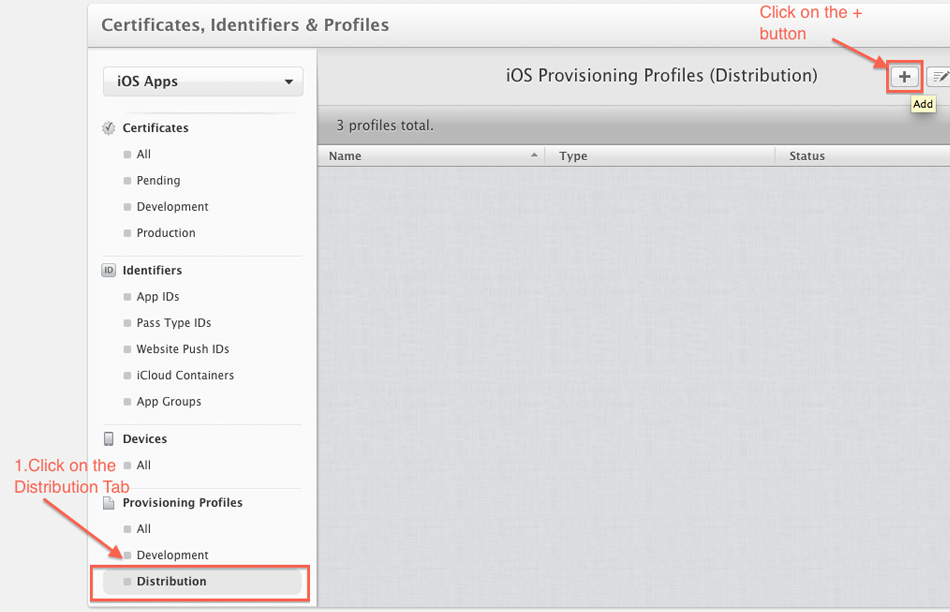
- Select App Store/tvOS App Store option Under Distribution and click Continue
- Select App Id that you created in Part 3-B and click Continue
- Select the Latest Certificate and click Continue
- Enter your App Name with Distribution. eg: YourAppName Distribution
- Download the Certificate and click on Done Button.
Steps 3 – E : Create an Apple App Store Paid Application Contract
To set up the Paid Applications Contract:
- Sign in to your iTunes Connect account
- Click on Agreements, Tax, and Banking tab
- Under Request Contracts, click Request for the iOS Paid Applications contract type
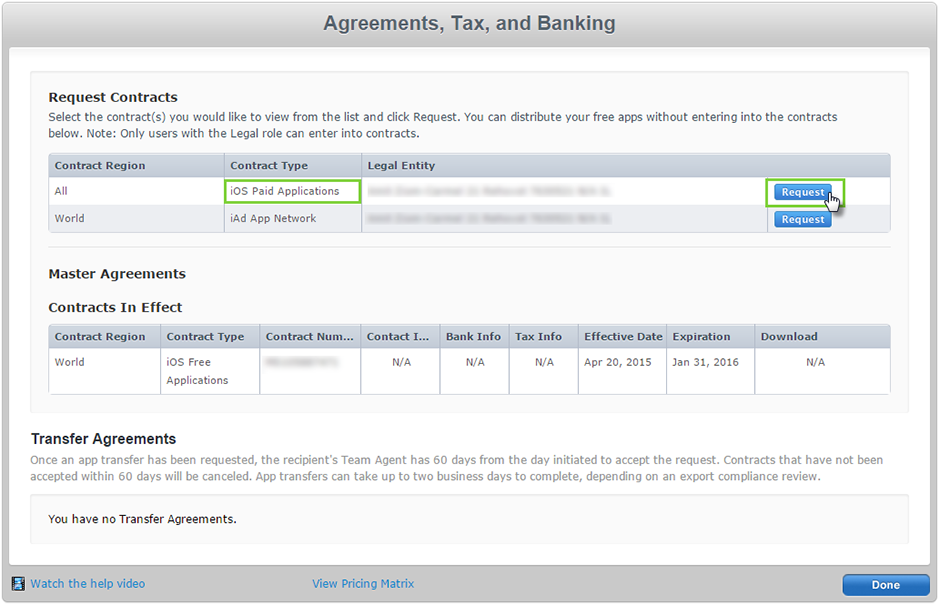
4. After you review the agreement, check I have read and agree to the agreement presented above and click Submit
5. The iOS Paid Applications contract is now displayed under Contracts In Process. You will need to set up the Contact Info, Bank Info and Tax Info.
Steps 4: Create App into iTunes Connect
- Go to https://itunesconnect.apple.com/
- Click on my Apps
- Click on ‘+’ sign
- Choose New App
- Choose iOS. Copy App name,choose language, Choose required Bundle ID (As on certificates),Write SKU (e.g., SKU1324APPNAME)
- Choose Category under App information
- Go to Pricing ->Choose suitable pricing fair(As per iTUnes guidelines)
- From Prepare for Submission-> Upload Screenshots
- Prepare for Submission-> Copy paste App Description and Keywords
- Upload logo, Fill Rating and all details like Name, email address. Contact number, etc
- Fill Contact Information and choose to Automatically release app.
Steps 5 : Upload Your App from Application Loader
- On your Mac computer, open the Application Loader
- Enter your Apple ID and password
- Click Next
- Click Deliver Your App
- Select the app you would like to submit and click Open
- Click Next
- Wait for the application loader to upload your file, and for the green check mark to appear (this verifies that your app was received and submitted to Apple).
- You have successfully added your application to the App Store. Click Done
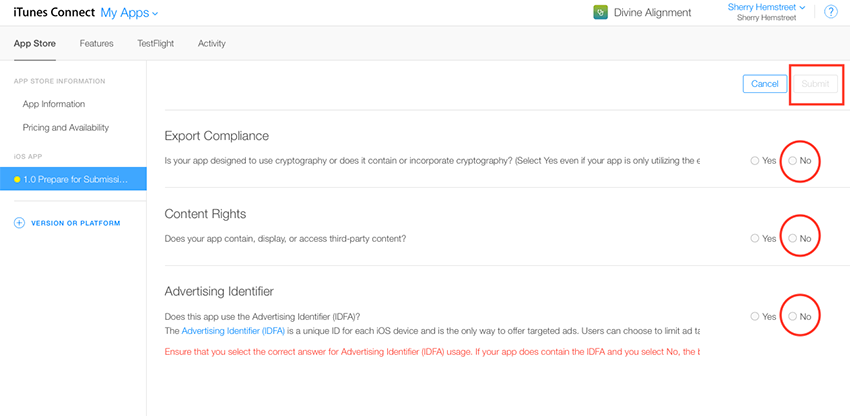
Steps 6 : Send Your App for Review
- After successfully added your application on the app store, Go back to your iTunes connect account
- Click on My app and click on your app name
- Now click on Activity Tab, in all Builds you will see your version under processing
- Now click on App store tab, click on prepare for submission now click on Build (+) and the choose build form App build and click on Done.
- Follow steps
You don’t need to check the status everyday because you’ll receive an email when the status changes. this article provided a step-through-step guide to configuring, building, and submitting an application for App store. I am hoping you’ve loved this tutorial and please share it with your buddies.
Leave A Comment